A Honolulu Backyard BRICK Oven
Building & Baking Adventure


Current Construction Progress: Final Layer of Insulation Done. Initial Firing!

Wednesday, October 13, 2010

Hawaii Portuguese Stone Oven

Big Island's Kona Historical Society has a brief history and info about the weekly Portuguese Sweet Bread Baking get togethers.

What is also interesting is their Portuguese oven construction:


And then the baking(!):


This particular stone oven is a massive heat sink that takes FOUR HOURS (according to the website) to come to proper temperature of 400 deg F.

There appears to be no thermal insulation at all around the outside of the oven or below the deck of the oven (notice the horizontal cement line).

If you have wood to spare and freely available, I suppose it doesn't matter about the insulation. As a side note, the Breadmans'  backyard oven takes EIGHT HOURS to come up to temperature.

For most backyard oven builders, I think it best you insulate both the outside of your oven as well as below your oven's hearth deck. This will allow your oven to not only retain heat longer but also possible come up to temperature sooner thus using less wood (or propane) in the process.

Sunday, October 3, 2010

Dragon Mastery aka Heat/Temperature Management


I've already baked several sourdough breads and even a pizza or two in the oven. However the finished baked goods are not something I'm proud of (yet) and my electric oven has baked them a whole lot better.

So I'm experimenting with various heat management techniques ...still!

Once I've conquered "The Dragon" to my satisfaction, I'll post my techniques and also the finished baked goods.

Wednesday, September 15, 2010

Bill of Materials

Current Cost of Project: $1,147.50 (includes Hawaii Excise Tax)
Hollow Tile 6x8x16 Knockout, 16 each @$1.57
Hollow Tile 6x8x16, 22 each @$1.67
Hollow Tile 6x8x8, 4 each @$1.17
Wonderboard 1/2 inch $12.67
Mortar Mix Quikcrete 60lbs.  $8.87
Rock Gravel 3/4inch 1/2 cubic feet, 4 each @$6.69 
Rebar 3/8 inch roundcut 10 feet, 2 each @$5.59
Rebar 3/8 inchx10feet, 2 each @$5.59
Rebar 1/2 inchx10feet, 4 each @$7.29
Sand 0.5 cubic feet, 14 each @$6.99
Cement 94#, 3 each @$16.27
Wooden Dowel 1 5/16in x 8 feet @$11.49
Chicken Fencing @$17.68
Aluminum Parts for Expensive Insulated Door @$125.10
Insulating Cement, 2 each @$53.77
Sairset High Temp Mortar 55# Pail @$51.10
Firebrick, 24 @$0.50 
Firebrick, 90 @$3.22
3 1/2 inch by 15 inch by 32 feet Insulation @$9.81
3/4 inch by 10 inch black pipe @$3.42
Vermiculite 6 cubic foot bag @$45.70
HPGX-2 Burner @$128.85


Color Legend: 
City Mill Honolulu
Pacific Refractories 
Reuse Hawaii 
Tileco Inc
Home Depot
Pacific Agriculture Sales
Teja's Smokers

A Door Is Born

Okay, I am designing an insulated aluminum door for the oven. The shiny aluminum will help reflect some of the heat back into the oven and what gets by will be handled by the 3 1/2 inch thick insulation I got from Home Depot (plenty leftover.)

The parts of this door I got from City Mill for $125.10.

Yeah, big big money.

But take a look at this door! What a honey it turned out to be!!


Two pieces of aluminum cut from a template I'd made earlier to fit in the arch doorway This shows the construction without the insulation.

And here it is with the insulation in:


And it's fitting nice and snug into its spot:


I must say that the aluminum door gives a nice finished look to the oven! Also the shininess of the Aluminum will reflect some heat back into the oven from the inside.

Initial Firing of Oven

In between laying on the insulation and then cementing over with a vermiculite cement mix, I did an initial firing of the oven with kiawe wood (aka mesquite wood). Kiawe wood grows on the arid places on the island. Historical note: It was initially brought over by catholic missionaries, and the first kiawe stump can be viewed at Our Lady of Peace at Fort Street Mall.

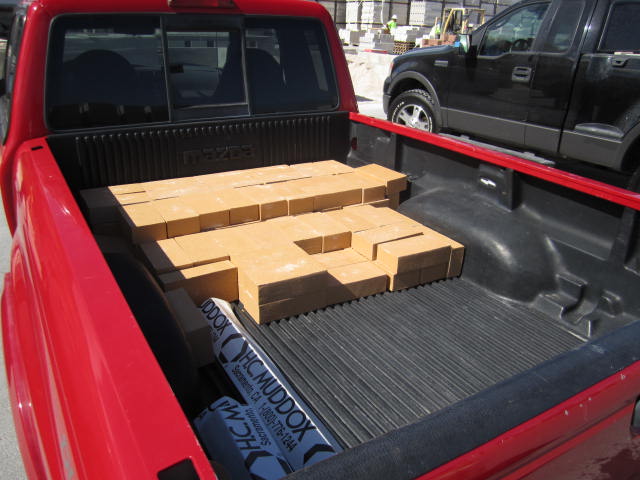
I bought $220 worth of kiawe wood cut up 18 inches long and around 3 inches in diameter. I found John off of Craigslist:


Okay, firing up the oven with the kiawe wood. If this is what it is going to take i.e. tons of smoke and soot all over the place, 2 1/2 hours or so to do, then horrors!!!

But fear not as one of my thinking way ahead ideas was to use PROPANE to provide heat to the oven. I searched online and settled on this cast iron burner from Teja's Smokers:


The great thing about this burner is that "ANY LENGTH" part. That is the pipe that connects the propane/air baffle mixer to the actual burner itself. In other words, the air and the propane is mixed OUTSIDE OF THE OVEN and then "piped in" to the burner that sits in the oven.

And that is exactly what I did:


Propane hookup and air mixing vane that's OUTSIDE the oven proper. And below is the burner at about 1/2 maximum:


This particular burner puts out 160,000 BTU per hour. That heat capacity is about the heat output from a medium wood fire. In heating up your oven, you don't want a hot hot blast of fire that will just use up all your wood (or propane in this case) for no good purpose; you want instead a steady heat source that will slowly heat up your oven's thermal mass.

And this HPGX-2 burner from Tejas Smokers does the job most excellently with NO smoke, No ash and No wood or wood babysitting!

Since this propane burner is cemented into the oven, it will be considered part of the oven building process, so one HPGX-2 burner from Tejas Smokers for $128.85 (including pressure regulator) delivered to me in Honolulu. I also got a 3/4 inch by 10 inch black pipe nipple from Home Depot for $3.42.

Hmmmm. Looking at the pile of kiawe wood (mesquite) I got for $220, that is the equivalent of 11 tanks (20 lbs. per) of propane refills from Home Depot. Having burned some kiawe wood already, I am quite positive that 11 propane tanks will outlast that $220 pile of kiawe wood I bought. So it is a win cost wise too (along with no ash, no smoke to bother my neighbors and no babysitting the wood burning!)

Insulation of Oven

To start, I placed aluminum foil all over the dome like so:


This will reflect some of the heat back into the oven. I had some spare rolls of aluminum foil in my kitchen.

I also picked up some 3 1/2 inch thick insulation batting (15 inches wide by 32 feet long) from Home Depot for $9.81:


That along with the chicken wire I purchased earlier from City Mill ($17.68) was applied to the outside of the dome:


The insulation from Home Depot was the easy to cut and assemble. I used a plain desk stapler to join the layers together (I initially used duct tape, but believe me staples work much much better and faster too!)

I then applied a vermiculite cement mixture over the paper backing of the insulation, embedding the chicken wire into the vermiculite mix for strength.


I bought the  6 cubic feet bag of vermiculite for $45.70 from Pacific Agriculture Sales at Campbell Industrial Park, 91-262 Ola'i Street. Phone 808-682-5113.


When everything is finished, I'll have around 7 1/2 inches of isulation around the top of the oven's dome and around 5 1/2 inches all around the sides.

I picked up another 94 pound bad of Hawaiian Cement from City Mill for $17.04.

Sunday, September 12, 2010

Brickwork Completed Finally!

Yup, no more making dust by cutting up bricks! Check it out (note the rectangle box on top that will help brick in a future 6 inch stove pipe to vent out smoke):

See that archway? That was the hardest part thus far. Lots of cutting and grinding with the makita outfitted with a diamond saw. PLENTY OF HOT, NOISY AND DUSTY WORK!!!

That glob of cement on the top of the oven dome is what was left from my mizzou refractory casting cement. It should act as additional thermal mass, like a cladding of sorts. I don't want to add too much thermal mass as that would take additional time to heat up the oven to proper temperature with a wood fire.

For baking breads, if there is not enough thermal mass to last a bake then I could always place in some leftover fire bricks along the perimeter of the hearth deck to act as a temporary thermal mass. I also am thinking of a small fire by the archway to act as a heat source (a real fire door!) to maintain a proper temperature of an otherwise "falling" oven.

So a "quick" warm up to 900 deg F. for pizzas and tandoor type flat breads and then for bread baking, additional thermal mass added ala loosely placed bricks to maintain a 450 deg F. temperature bake. (Can't wait to try!)

The section below the oven's entrance I plan to place ceramic tile:


And below everything, that perfect spot for wood storage:

Saturday, September 11, 2010

Major Brickwork Done!!!

Oven brickwork pau (done). Each brick besides the first soldier course had to be cut individually with different angles all the way around. It was very time consuming, dusty, noisy (cut with a diamond blade on a makita grinder) and a drag to do.

Steps in making the new arch doorway:


Cutting the keystone (two) that betweenist will become the chimney smoke stack.


Looking at how things turned out, the two bricks to either side of the keystone are probably the weakiest points of this arch. However things should be strong enough to support a future stainless steel smoke stake (crossing fingers).


Sunday, September 5, 2010

Doorway Redo

Here's the latest progress picture:


Yup, got the dome all completed, bricked up. And was it a pain!  Each brick had to be cut individually and had different angles, sometimes on all four sides! I read online that refractory brick manufacturers made specially angled cut bricks for dome structures. Good luck finding such firebricks here in Hawaii.

But oh, where's the door archway that was there before???

Well, the insulating cement (that one with wool in it) never ever cured; it remained plastic enough that I could push my finger into it, all the way thru! As a result, the old doorway arch (with smoke chimney) started to lean about 1/4 inch, which threw things off a lot.

So I dismantled the archway completely. Then I lit a propane burner below the platform to heat up the insulating cement slab from the bottom:
 

I left the burner on for 24 hours at full flame.

Finally the insulating cement is hard and I thought cured. Then it rained heavily and where the water touched the surface of the "cured" insulating cement, the cement turned plastic again! It seems that this insulating cement is not for wet environments and will disintegrate if subject to same.

Once I get a ceramic insulation blanket on with an outer layer of stucco, there shouldn't be any moisture reaching the insulating cement. I also will redesign the archway to look more like that one I made for the olympic arena a whiles back.

I also lit a fire in the dome to help dry out the refractory cement that I used to cement the dome's firebricks.

Tuesday, August 31, 2010

Piece by Piece, Bricks Are Laid

Yup, did the second course of fire brick laying. Each brick manually cut on three sides by a mason hammer. Taking a long time to do.

Saturday, August 28, 2010

Hearth, First Course and Arch Mortared

Okay, this is what happened today.

I laid down the hearth firebricks on to the insulating 2.5 inch thick pad. The bricks are laid without mortar. Then I mortared the first course of bricks of the dome on these hearth firebricks. Also I did the arch for the oven's door area and within this arch I made a smoke chimney!


I was working full time and didn't have a chance (dirty dusty clothes, etc.) to take step by step pictures. A lot done and it all looks nice. Later on when the dome is completed, I'll cut off the firebricks that are poking out the bottom.


The arch I made in place. I used loose brick (removed partially for photo) below the arch for support. The midpoint of the arch is exactly 9 inches high. The span of the arch is 20 inches.


I think I'll give this all a week to harden up. The 2.5 inch thick insulating cement layer below all these bricks is still somewhat plastic. It's been over three days too!

Oh and this is how I used to make my arches, back in the day:


Original Olympic Arena Archway Entrance, Greece

Insulating Cement Laid

Took little over a bag to lay down the insulation pad that will be beneath the firebrick of the oven's hearth. This is the stuff I used and mixing water into it until it is like an oatmeal mush consistency:


I shaped the pour into a circle with a straight part for the door part. Taped my level to a stick to make things flat.


It took some time to get it all level. A long time. If I had forms around this top pad, the leveling would have gone much faster.

Also, something about this insulating cement is that it takes a long time to firm up enough to place your bricks on top of it. Like three days or so! The thickness of the insulating cement pad is 2 1/2 inches thick and a diameter of 40 inches. This isn't the normal "mix vermiculite with cement" mixture but a professional insulation cement that contains among other things, wool.

Firebricks at Tileco @ Campbell Industrial Park

Picked up 90 Firebricks @ $3.25 each. These bricks are not of the high quality that I got on the cheap from Reuse Hawaii, which are also the high quality firebricks at Pacific Refractories @ $5.75 each.

The Tileco firebricks are not square and bulge out on its sides. For constructing the oven's dome, this isn't a big issue as mortar is forgiving.


Tileco out in Campbell Industrial Park is a huge huge place! They make their own pavers and hollow tile but these firebricks they get from the mainland,  from H.C. Muddox.


From Tileco Inc:
Firebricks 4.5inch x 9inch x 2.5inch, 90 @$3.25

Total with Hawaii excise tax: $303.45

Friday, August 27, 2010

Slab Poured

Placed a brace on top a sawhorse to support the middle of the Wonderboard. Then poured concrete over the rebars.

Sloped the sides up nicely ---no wood forms used or needed (saved some money):


Spent more money on cement and sand.

City Mill:
Sand, 7 each @$6.99
Cement 94# @$16.27
Wooden Dowel 1 5/16 x 8 feet (for leveling insulation cement) @ $11.49
Total: $80.31

Wednesday, August 25, 2010

Slab Concrete Foundation


What's a sumo picture have to do with a woodfired oven?

Well, note how the sumo ring is built. It has sloped sides starting off in a perfect square. Then the sumo ring in show in white (salt). Well, this is how I am now thinking of constructing my supporting slab. It will be make of concrete (cement and gravel mix with rebar) but instead of using vertical wood forms, I will just manually angle it upwards just like a sumo ring.

And the circle would be my oven placement on the slab. This way I will save on having to get plywood and constructing form work. I'll also save some on the concrete needed.


Here you can see the 1/2 inch rebar I used. I've grouted the perimeter of the wonderboard below and supported midway the front with my pickax. By tomorrow the grouting should be strong enough to support my 3 inch deep concrete pour...

Also if you look carefully, you can see the beginnings of that sumo ring's sloping.

The Price of Firebrick in Honolulu

Called up Tileco Inc located in Campbell Industrial Park (808) 682-5737 about their firebricks. Price per brick is $3.22 !! which compared to Pacific Refractories $5.75 makes it a bargain here in Hawaii.

I'll be getting firebricks from Tileco when I start working on my oven's dome.

On, the clay bricks from Tileco (Montery line) is $2.45 each and I may use those for the deck entrance to the oven...

Possible Additional Honolulu Fire Brick Source

With Pacific Refractories asking $5.75 per firebrick, I have been searching online for some other Hawaii source.
Found tilecoInc with firebricks and clay bricks.

I'll call them up this morning to find out the scoops.


I could use the cheaper clay bricks for the loading area and the oven door's arch and stuffs.

Foundation Walls Done


Walls all done and completed grouting four corners and three mid points. Casting the deck slab is next...

Had to buy more fine gravel for the grouting.

From City Mill:
Rebar 3/8 inchx10feet, 2 each @$5.59
Rebar 1/2 inchx10feet, 4 each @$7.29
Basalt Sand, 7 each @$6.99
Basalt Rock @$6.69
Cement 94# @$16.27  (I quit using QuikCrete, too expensive)

Total with Hawaii excise tax: $117.51

Tuesday, August 24, 2010

Re-use Hawaii

Okay, feeling bummed out at the $5.75 per firebrick asked by Pacific Refractories, I went to this place called Re-use Hawaii which is in Kakaako, next to UH School of Medicine. I saw a craigslist ad they placed about CLAY PAVER BRICKS which I thought might do the trick...

...and well, I went there and all these clay bricks were spalling! Flaking right and left! Chips were falling off in my hands! Not good at all. So feeling even more bummed, I walked around and around looking...

...and spied this baby:


Note: In the background are the craigslist clay paver bricks and even from here you can see the spalling occurring.


WOW!!!! Firebricks, and UNUSED,  IN LIKE NEW CONDITION!!!  I picked up 24 of these cute babies @ 50 cents a piece!!! Compare that to $5.75 that Pacific Refractories wanted. Whoa!

I asked Re-use Hawaii about these bricks and seems like someone donated them, so sad to say this is a one time shot. The Re-use Hawaii guys didn't know what these bricks were or how valuable they were. It was also like God or something guiding me here to this.

From ReUse Hawaii:
Firebricks in DISGUISE AS REGULAR BRICKS, 24 each @$0.50

Total with tax: $12.57  (astounding....)

Pacific Refractories LLC

As mentioned in the first post, getting any sort of fire-rated material is a challenge. Luckily I found this place here in Honolulu (Kalihi):


Bill (older fella, like around 70) is the warehouse/delivery person. Nice guy. Gloria is the office sales person (at another location). Look, I found FIREBRICKS inside:

Alas, at $5.75 per, I won't be biting. I did however pickup Insulating Cement and also high temperature grouting cement:


I also looked at the Mizzou CASTING Cement which is used for creating your very own firebrick grade material that you form into however you want. I'll keep this product in mind as I may use some to finish my oven's dome.

From Pacific Refractories:
Insulating Cement, 2 each @$53.77
Sairset High Temp Mortar 55# Pail @$51.1

Total with Hawaii tax: $161.10 so adding to the running total, see above.

First Foundation Course Done!

Clearing out area in the garden for the oven:


Note the low stone wall in the background. I will be using it's footing for the back of my foundation support for the oven.


Trying out the final design on a sidewalk adjacent to the actual place the oven will be (above pic.)
The foundation will be 41 1/2 inches wide by 48 inches long. This longer part will be for the loading area of the oven...


After much fooling around with string and a line level, finally I got the first course of hollow tile all laid out nicely nice:


Tomorrow I'll lay in some re-bar and also fully grout the hollow tile. Oh, for a footing I just put in around 6 inches of gravel and then laid the hollow tile on top of it. I want to save some cement/money by not having a concrete footing. Instead, I'll fully re-bar the first course and also the top course and do a full row of grout,  top and bottom. I'll also grout/re-bar the four corners and two in the middle on the longer sides.

I also will just dry stack the hollow tile in between the bottom and the top course of hollow tiles.

Saturday, August 21, 2010

Initial Plans & Purchases


Drew out my plans. I FOUND A SOURCE OF FIRE BRICKS here on Oahu thru Craigslist. Just a $1 per 6"x12" red clay bricks about 4 inches thick!!! Very cool...

So the middle drawing is the layout of my hearth oven floor. It will be 30 inches deep i.e. 2 and 1/2 bricks and about 32 inches wide i.e. 4 each of those bricks laid lengthwise.

The bottom drawing (also looking downwards) is the layout of the hollow tile (6"x8"x16" size). There will be five courses (rows) of hollow tiles which comes out to 40 inches tall wall. I plan to cut some cement board (wonderboard) to span the U shaped hollow time to surface and then place some cut up rebar laying down on the wonderboard and then pouring cement all over it creating a strong reinforced concrete table top.

Initial Purchase from City Mill:

Hollow Tile 6x8x16 Knockout, 16 each @$1.57
Hollow Tile 6x8x16, 22 each @$1.67
Hollow Tile 6x8x8, 4 each @$1.17
Wonderboard 1/2 inch $12.67
Motar Mix Quikcrete 60lbs.  $8.87
Rock Gravel 3/4inch 1/2 cubic feet, 3 each @$6.69
Rebar 3/8 inch roundcut 10 feet, 2 each @$5.59

Total with Hawaii excise tax $124.96

Building a Stone Oven in Hawaii

There are a whole bunch of websites about building earth ovens (cob oven) or "real" stone ovens...

...but none about building a backyard stone oven in HAWAII.

Living in a tropical climate such as Oahu there isn't much demand for fireplaces and such (but I've seen Big Island websites showing commercial fireplaces, saunas and barbecues though.) It's hard to get any sort of refractory materials locally here.

Today August 21, 2010 starts my stone oven building adventure.

GOAL: To have a working wood fired stone oven operational i.e. cooking my sourdough breads and neapolitan type pizza.